Follow Me On Social Media!

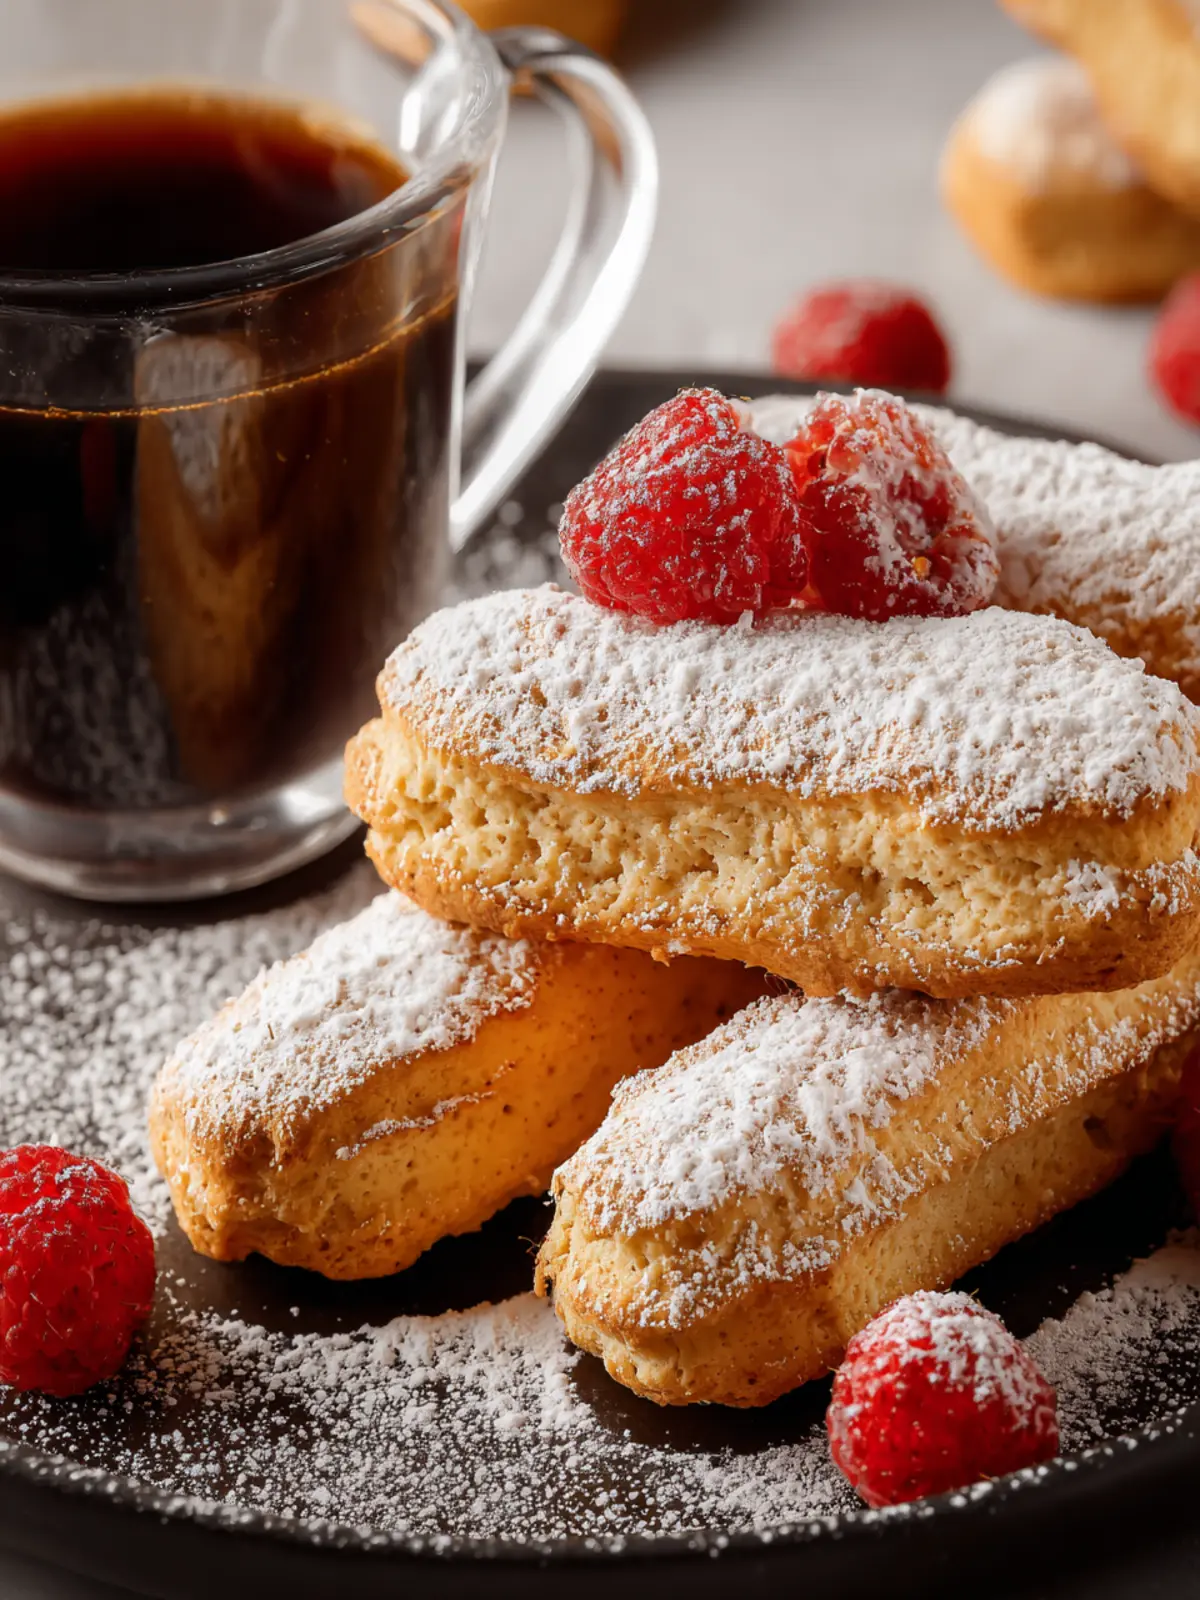
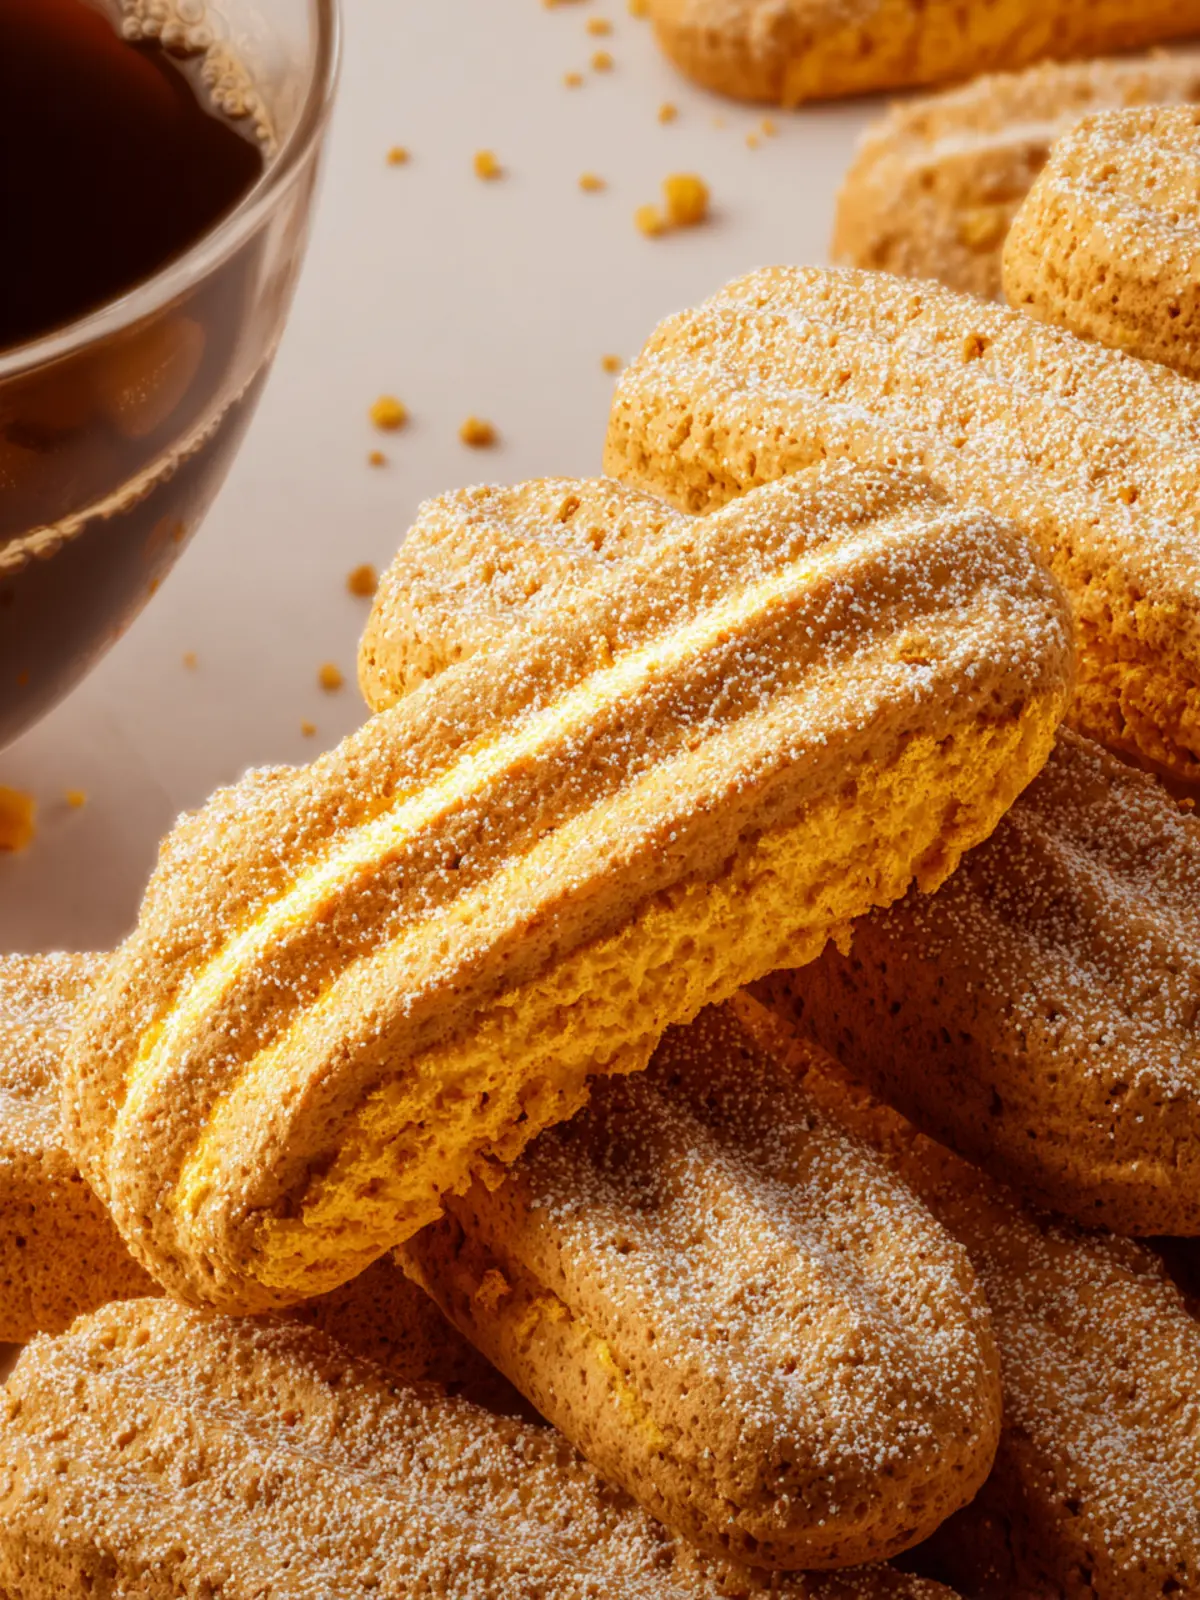
Gluten Free Ladyfingers: Light, Fluffy, and Irresistibly Delicious
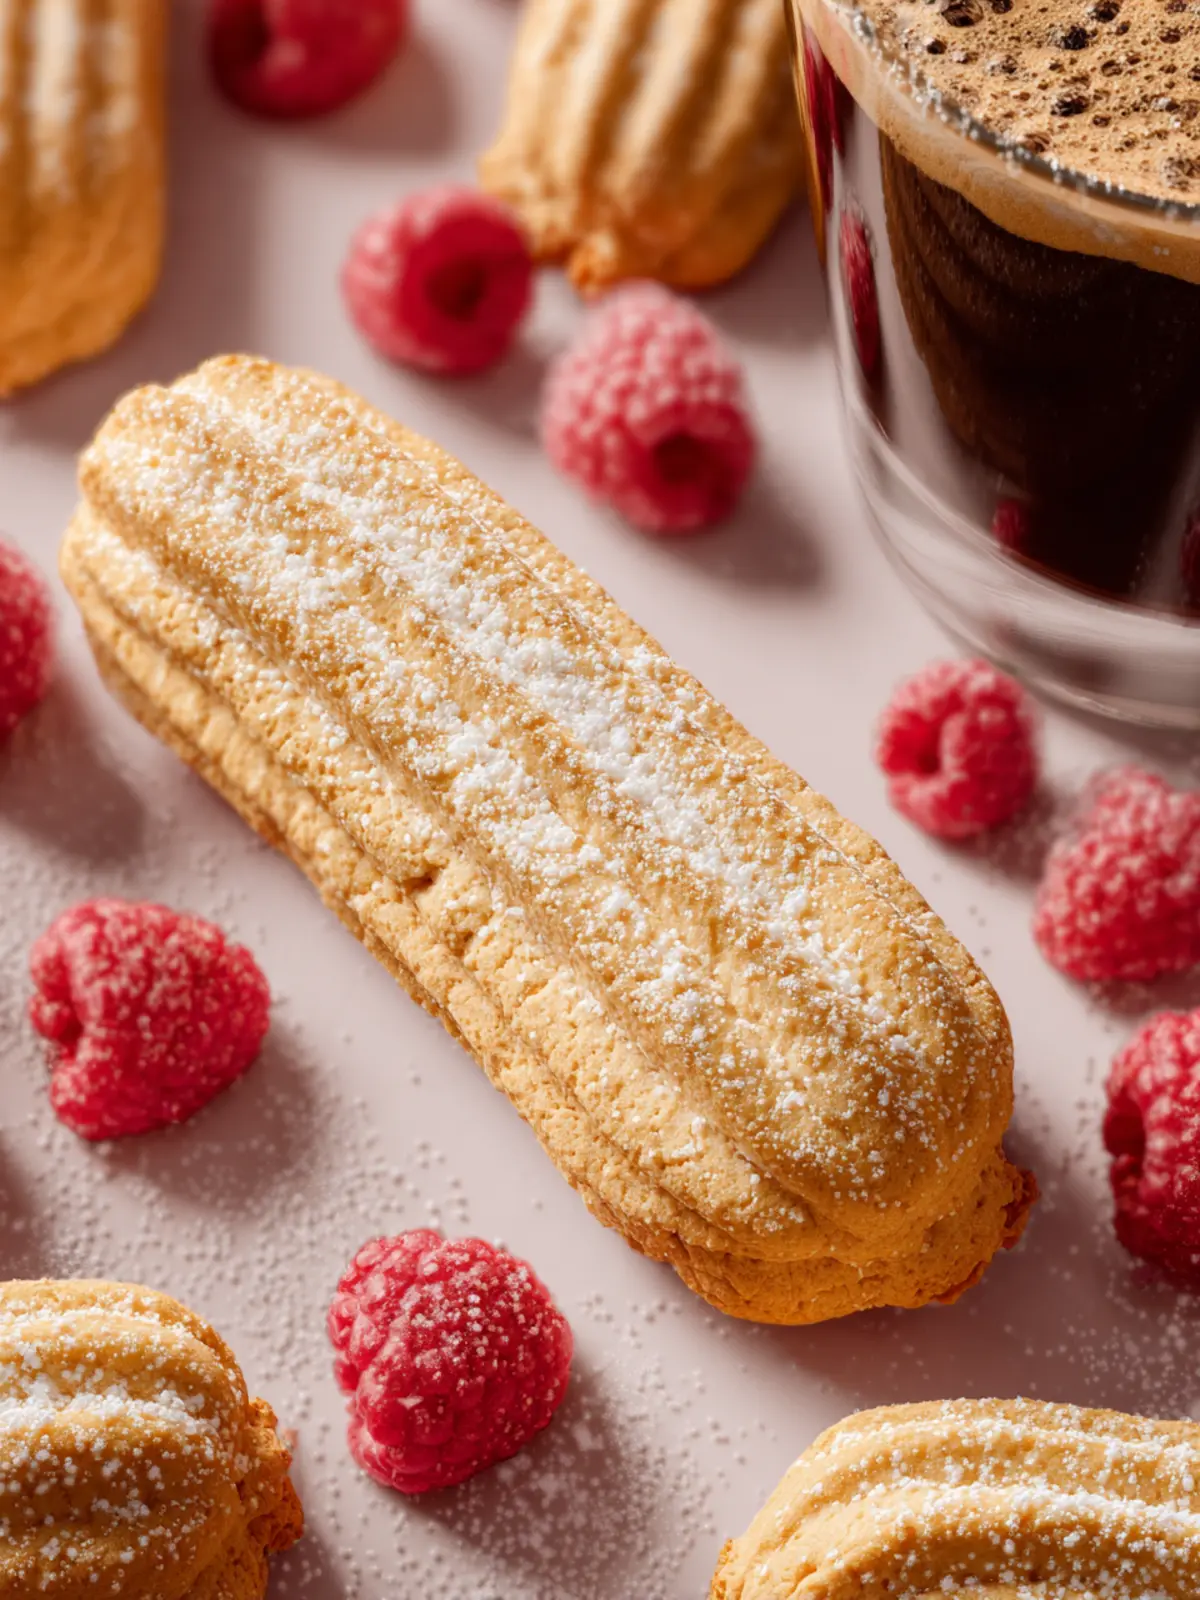
Introduction to Gluten Free Ladyfingers
Imagine stepping into a world of delicate flavors and soft textures with gluten free ladyfingers, the unsung heroes of many delightful desserts. These charming sponge cookies are not only a treat for your taste buds but also a canvas for your culinary creativity. Whether you’re whipping up a classic tiramisu or simply enjoying them with a cup of coffee, their lightness and subtly sweet flavor make them irresistible.
What sets gluten free ladyfingers apart is their unique texture and versatility. Traditionally made with wheat flour, these cookies can often leave gluten-sensitive diners in the lurch, but the gluten-free version opens up a whole new world of possibilities. Made with alternatives like almond flour or gluten-free all-purpose flours, they retain their signature airy quality while ensuring everyone can indulge without worry. It’s exciting to see how a classic recipe can be reimagined to accommodate various dietary needs, all while staying true to its original charm.
What makes gluten-free ladyfingers a unique treat?
The allure of gluten free ladyfingers lies in their fluffy, sponge-like consistency. With just the right amount of sweetness and a sprinkle of powdered sugar on top, they serve as an excellent base for various desserts. Imagine layering them in a trifle, soaking them in coffee liqueur for a traditional tiramisu, or simply enjoying them on their own.
Here are some additional highlights that make these cookies so special:
- Airy Texture: The lightness of gluten free ladyfingers allows them to soak up liquid without becoming mushy, making them perfect for layered desserts.
- Adaptability: They can be flavored with vanilla, chocolate, or even citrus zest to complement whatever dessert you’re crafting.
- Easy Preparation: You’ll find that making gluten free ladyfingers at home is straightforward and rewarding, giving you complete control over ingredients.
Why not give them a try? With the right technique and ingredients, you’ll find that these gluten free ladyfingers can be just as delightful—if not more so—than their gluten-containing counterparts. From sweetening your coffee breaks to impressing at parties, these little cookies are bound to become a go-to in your kitchen.

Key Ingredients for Gluten Free Ladyfingers
Creating the perfect gluten free ladyfingers is all about using the right ingredients that contribute to both taste and texture in every bite. With a few special picks, you’ll be delighting in tender, airy ladyfingers that are perfect for dessert!
Eggs: The backbone of any ladyfinger, eggs provide structure and richness. It’s important to separate the yolks from the whites. Beating the whites until stiff peaks form gives that light, airy texture we all love.
Sugar: Using granulated sugar is crucial for achieving that delightful sweetness while maintaining the moisture of the batter. It caramelizes just right when baked, adding a lovely hint of crunch.
Gluten-Free Flour Blend: Utilizing a high-quality gluten-free flour blend is non-negotiable. Look for one that has a good mix of starches and fibers to replicate the texture of traditional ladyfingers.
Vanilla Extract: A splash of vanilla extract adds a warm aroma and enhances the overall flavor, making your gluten free ladyfingers irresistible.
Baking Powder: This leavening agent gives the ladyfingers a little lift, resulting in that classic spongy texture we all crave.
With these key ingredients, you’re well on your way to mastering the art of gluten free ladyfingers. Enjoy!
Why You’ll Love This Recipe
Imagine biting into a deliciously light and airy treat that satisfies your sweet tooth while accommodating your dietary preferences. These gluten free ladyfingers are perfect for any occasion—whether you’re hosting a dinner party or simply indulging in a cozy afternoon tea. Here’s why you’ll adore making this recipe!
-
Subtle Sweetness: The balance of sugar in these ladyfingers provides just the right amount of sweetness without overpowering. They’re perfect for dessert or as a snack—not to mention fantastic for dipping in coffee or tea.
-
Versatile Texture: The light and airy texture of these ladyfingers makes them an excellent base for an array of desserts. Use them in a classic tiramisu or layer them in a fruit trifle for a refreshing twist.
-
Easy to Make: You don’t need to be a master baker to whip up this recipe. With simple ingredients and clear instructions, you’ll find success on your first try, impressing friends and family alike.
-
Health-Conscious Choice: Being gluten-free, these ladyfingers open the door for those with dietary restrictions, allowing everyone to enjoy a delightful treat without a worry.
Prepare to fall in love with these gluten free ladyfingers, and savor the taste that makes them a beloved choice in any kitchen!
Variations on Gluten Free Ladyfingers
Exploring the world of gluten free ladyfingers is like embarking on a delightful culinary adventure. These versatile treats can be tailored to suit various tastes and occasions, ensuring that everyone, regardless of dietary needs, can indulge in their deliciousness. Let’s look at some creative variations that might just become your new favorites!
Flavor Enhancements
-
Cocoa Powder: For a chocolatey twist, simply replace a portion of the flour with cocoa powder. This addition creates a rich, dark flavor that’s perfect for chocolate desserts or as a base for tiramisu.
-
Citrus Zest: Adding a teaspoon of lemon or orange zest to the batter infuses a bright, fresh flavor that complements the sweetness of the ladyfingers. It’s a perfect match for creamy desserts.
Healthier Alternatives
-
Nut Flours: Substitute part of the gluten-free flour with almond flour or coconut flour. This not only adds a nutty flavor but also boosts the nutritional profile of your gluten free ladyfingers.
-
Sweetener Swaps: Consider using honey or maple syrup in place of granulated sugar for a more natural sweetness. This adjustment gives the ladyfingers a wonderful depth of flavor.
Special Occasion Variations
-
Matcha Powder: For a unique and eye-catching twist, add matcha powder to your batter. The result is a beautiful green hue and an earthy flavor that’s sure to impress at any gathering.
-
Coffee Infusion: Mixing instant espresso powder into the batter can add a lovely coffee note, perfect for serving alongside a cup of joe at brunch or as an accompaniment to dessert.
With these variations, your gluten free ladyfingers will not only cater to diverse palates but also elevate your baking game. So why not give them a try and find your favorite?
Cooking Tips and Notes
Creating gluten free ladyfingers feels like an art form—each delicate cookie brings a touch of elegance to your desserts. Here are some insider tips to help you master this recipe effortlessly.
Whipping the Egg Whites
The key to airy, light ladyfingers lies in perfectly whipped egg whites. Use a clean, dry bowl and whisk. Pay attention to the peaks: soft peaks are ideal for incorporating into the batter. If you overwhip, they can become grainy, affecting the ladyfingers’ texture.
Choosing Your Gluten-Free Flour Blend
Not all gluten-free flour blends are created equal. Aim for a high-quality mix that includes xanthan gum for a better structure. If you have the option, consider using almond flour or coconut flour in part for a unique flavor twist.
Baking Time Matters
Keep an eye on the baking time. Every oven behaves differently. Look for a light gold color; removing them too soon can lead to chewy ladyfingers.
Storing Your Ladyfingers
Once cooled, store your gluten free ladyfingers in an airtight container to keep them fresh. They can also be frozen for future use—just remember to layer them with parchment paper to prevent sticking.
Sweetness Level
Feel free to adjust the sugar level based on your taste preference. If you prefer a less sweet treat, reduce the sugar slightly while keeping an eye on the texture.
With these tips in hand, you’ll be well on your way to creating flawless gluten free ladyfingers that are sure to impress! Happy baking!
Serving Suggestions for Gluten Free Ladyfingers
There’s something truly delightful about enjoying gluten free ladyfingers. Whether you’re a fan of classic dessert pairings or looking to create something truly unique, these light and airy treats open the door for a world of serving possibilities.
Pairing with Coffee or Tea
One of the simplest yet most satisfying ways to serve gluten free ladyfingers is with a cup of your favorite coffee or tea. Their sponge-like texture makes them perfect for dipping, and the rich flavors of coffee or tea truly complement the light sweetness of the ladyfingers. Imagine hosting a cozy afternoon gathering!
Layered in Parfaits
For a more extravagant presentation, consider layering gluten free ladyfingers in a parfait. Alternate between layers of fresh whipped cream and seasonal fruits, such as strawberries or blueberries. This not only adds beautiful colors to your dish but also enhances the flavors, creating a delightful explosion of taste in every bite.
As a Tiramisu Base
If you’re feeling adventurous, use gluten free ladyfingers as the base for a classic tiramisu. Their delicate structure can absorb the coffee and liqueur beautifully, providing that traditional dessert with a gluten-free twist.
However you decide to serve them, gluten free ladyfingers promise to impress, offering a perfect blend of versatility and flavor that will make you the star of any gathering. Enjoy exploring these tasty combinations!
Time Breakdown for Making Gluten Free Ladyfingers
Making gluten free ladyfingers is a delightful venture into the world of light and airy desserts. Understanding the time commitment can set you up for success in the kitchen.
Preparation Time
Typically, you’ll spend about 20-25 minutes preparing your ingredients and mixing the batter. This stage is crucial to ensure your gluten free ladyfingers have the right texture.
Baking Time
Once your batter is ready, pop those ladyfingers into the oven for 10-12 minutes. Keeping an eye on them is key; you want that lovely golden color without overbaking.
Total Time
In all, expect to invest around 30-40 minutes from setup to cooling. A little patience here will reward you with a sweet, elegant treat that’s perfect for any occasion!
Nutritional Facts for Gluten Free Ladyfingers
Exploring the world of gluten free ladyfingers unveils a delightful balance of taste and nutrition. If you’re ever curious about what these little treats contain, you’re in for a surprise.
Calories
In a serving of gluten free ladyfingers, you can expect around 100 calories. This makes them a light option if you’re craving a sweet snack without overindulging.
Protein
Each serving also packs about 2 grams of protein. While ladyfingers are primarily a dessert, they do contribute a small amount of protein to your diet, which can be enhanced further by pairing them with a protein-rich dip or cream.
Sodium
With only 30-40 mg of sodium per serving, gluten free ladyfingers are a heart-healthy option. This low sodium content makes them suitable for those watching their salt intake, adding to their appeal as a versatile treat.
Enjoy these delightful, airy treats guilt-free, knowing they offer not just flavor but a thoughtful nutritional profile to complement your meals or snacks!
FAQs about Gluten Free Ladyfingers
When diving into the world of gluten free ladyfingers, you may have a few questions about how to adapt them to your dietary needs or how to utilize them in delicious recipes. Let’s clarify some common inquiries!
Can I make these ladyfingers dairy-free?
Absolutely! You can make gluten free ladyfingers dairy-free by substituting traditional ingredients. Instead of using regular eggs, you can try aquafaba (the liquid from canned chickpeas), which provides a similar texture and binding quality. For a dairy-free replacement for any butter or cream in your recipe, coconut cream or a plant-based butter can work wonders without compromising the taste.
What are some common uses for gluten-free ladyfingers?
Gluten free ladyfingers are incredibly versatile! Here are a few popular uses:
- Tiramisu: Layer them with coffee and mascarpone for a classic dessert.
- Trifle: Alternate layers of ladyfingers with custard, fruit, and whipped cream for a stunning presentation.
- Pavlova: Use them as a base for this meringue dessert, topped with fruit and whipped cream.
- Cake Layers: They can serve as a light sponge in various cake preparations.
How should I store leftover ladyfingers?
To keep your gluten free ladyfingers fresh, store them in an airtight container at room temperature for up to three days. If you want to prolong their shelf life, consider freezing them. Simply place them in a freezer bag or container, separating layers with parchment paper. They can last for up to three months in the freezer. Just let them thaw at room temperature before using!
With these tips, you’re well-equipped to enjoy your gluten free ladyfingers in a variety of delightful ways!
Conclusion on Gluten Free Ladyfingers
Creating gluten free ladyfingers is not just about accommodating dietary restrictions; it’s about embracing flavor, texture, and that delightful nostalgia of classic desserts. By using simple yet high-quality ingredients, these naturally gluten-free delights can stand proudly alongside their traditional counterparts. Whether you’re layering them in a tiramisu or enjoying them with fresh strawberries, these ladyfingers offer more than just a suitable alternative—they deliver a satisfying experience that everyone can appreciate.
So grab your whisk and get ready to impress friends and family with your homemade batch of gluten free ladyfingers. You’ll be amazed at how blissfully easy and enjoyable they are to make.
Print
Gluten Free Ladyfingers
- Total Time: 47 minutes
- Yield: 24 ladyfingers 1x
- Diet: Gluten Free
Description
Light and crispy gluten free ladyfingers, perfect for desserts like tiramisu.
Ingredients
Scale
- 1 cup gluten free all purpose flour with xanthan gum
- ¾ teaspoon baking powder
- ½ teaspoon salt
- 3 large eggs
- ½ cup and 1 tablespoon granulated sugar (divided)
- 1 teaspoon vanilla extract
- Powdered sugar (for dusting)
Instructions
- Preheat your oven to 350°F (163°C) and line two baking trays with parchment paper.
- In a medium bowl, sift together your flour, baking powder, and salt. Set aside for later.
- Separate your egg yolks from the whites and place in separate medium-sized bowls.
- Mix your egg whites with a hand or stand mixer until it reaches soft peaks, then slowly add in half of your sugar and continue to beat until stiff peaks are achieved. Set aside.
- To your yolks, add your vanilla and the other half of the sugar and beat with a hand or stand mixer on medium-high speed until the mixture is pale in color and tripled in volume, about 4-5 minutes.
- Carefully fold in ⅓ of the egg whites into your yolk mixture by creating swooping motions from the bottom of the bowl to the top, being careful not to overmix and lose all the volume you worked hard to create. Once incorporated, add the remaining egg whites and fold until it’s almost all mixed in.
- Add in your flour mixture and carefully fold everything together, using the same swooping motion, just until there are no lumps.
- Once your batter is ready, pour it into a piping bag fitted with a ½ inch round piping tip. You can also use a gallon freezer bag and cut the corner off to about the same size.
- To your baking sheets lined with parchment, pipe your ladyfingers in neat rows, about 3-4 inches long, making sure to leave about 1-2 inches of space in between the cookies so that they don’t touch as they rise.
- Use a sieve or sifter to lightly dust the tops of the cookies with powdered sugar.
- Place both of the trays in the preheated oven and bake together for 15 minutes. Once done, drop the temperature to 300°F (150°C) for an additional 12 minutes. This step helps the cookies to dry out, creating a crispy cookie texture.
- Remove the trays from the oven and allow the cookies to rest until completely cool before enjoying.
Notes
- Ensure the egg whites are at room temperature for better volume.
- Store in an airtight container to maintain crispness.
- Prep Time: 20 minutes
- Cook Time: 27 minutes
- Category: Dessert
- Method: Baking
- Cuisine: Italian
Nutrition
- Serving Size: 2 ladyfingers
- Calories: 40
- Sugar: 2g
- Sodium: 28mg
- Fat: 1g
- Saturated Fat: 0g
- Unsaturated Fat: 0g
- Trans Fat: 0g
- Carbohydrates: 8g
- Fiber: 0g
- Protein: 2g
- Cholesterol: 37mg