Follow Me On Social Media!

Sourdough Bread Made Easy: Bubbly Loaves for Everyone!
Introduction to Sourdough Bread
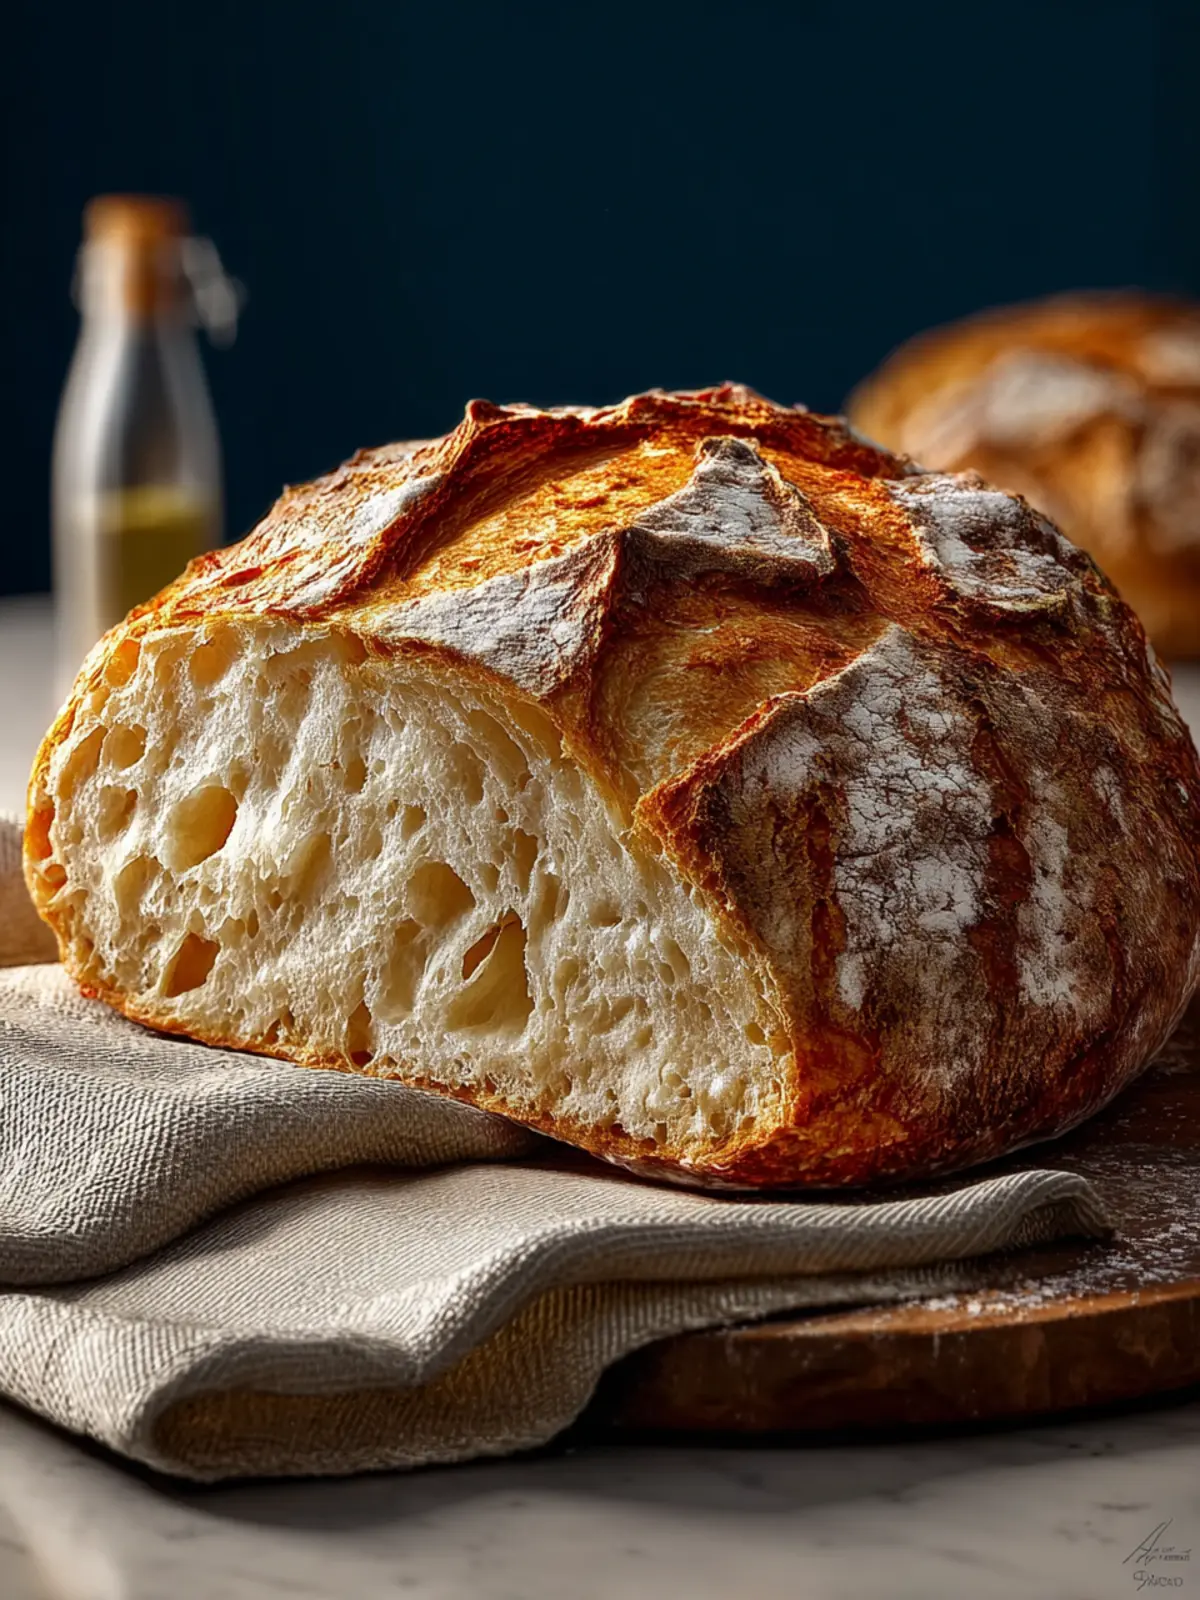
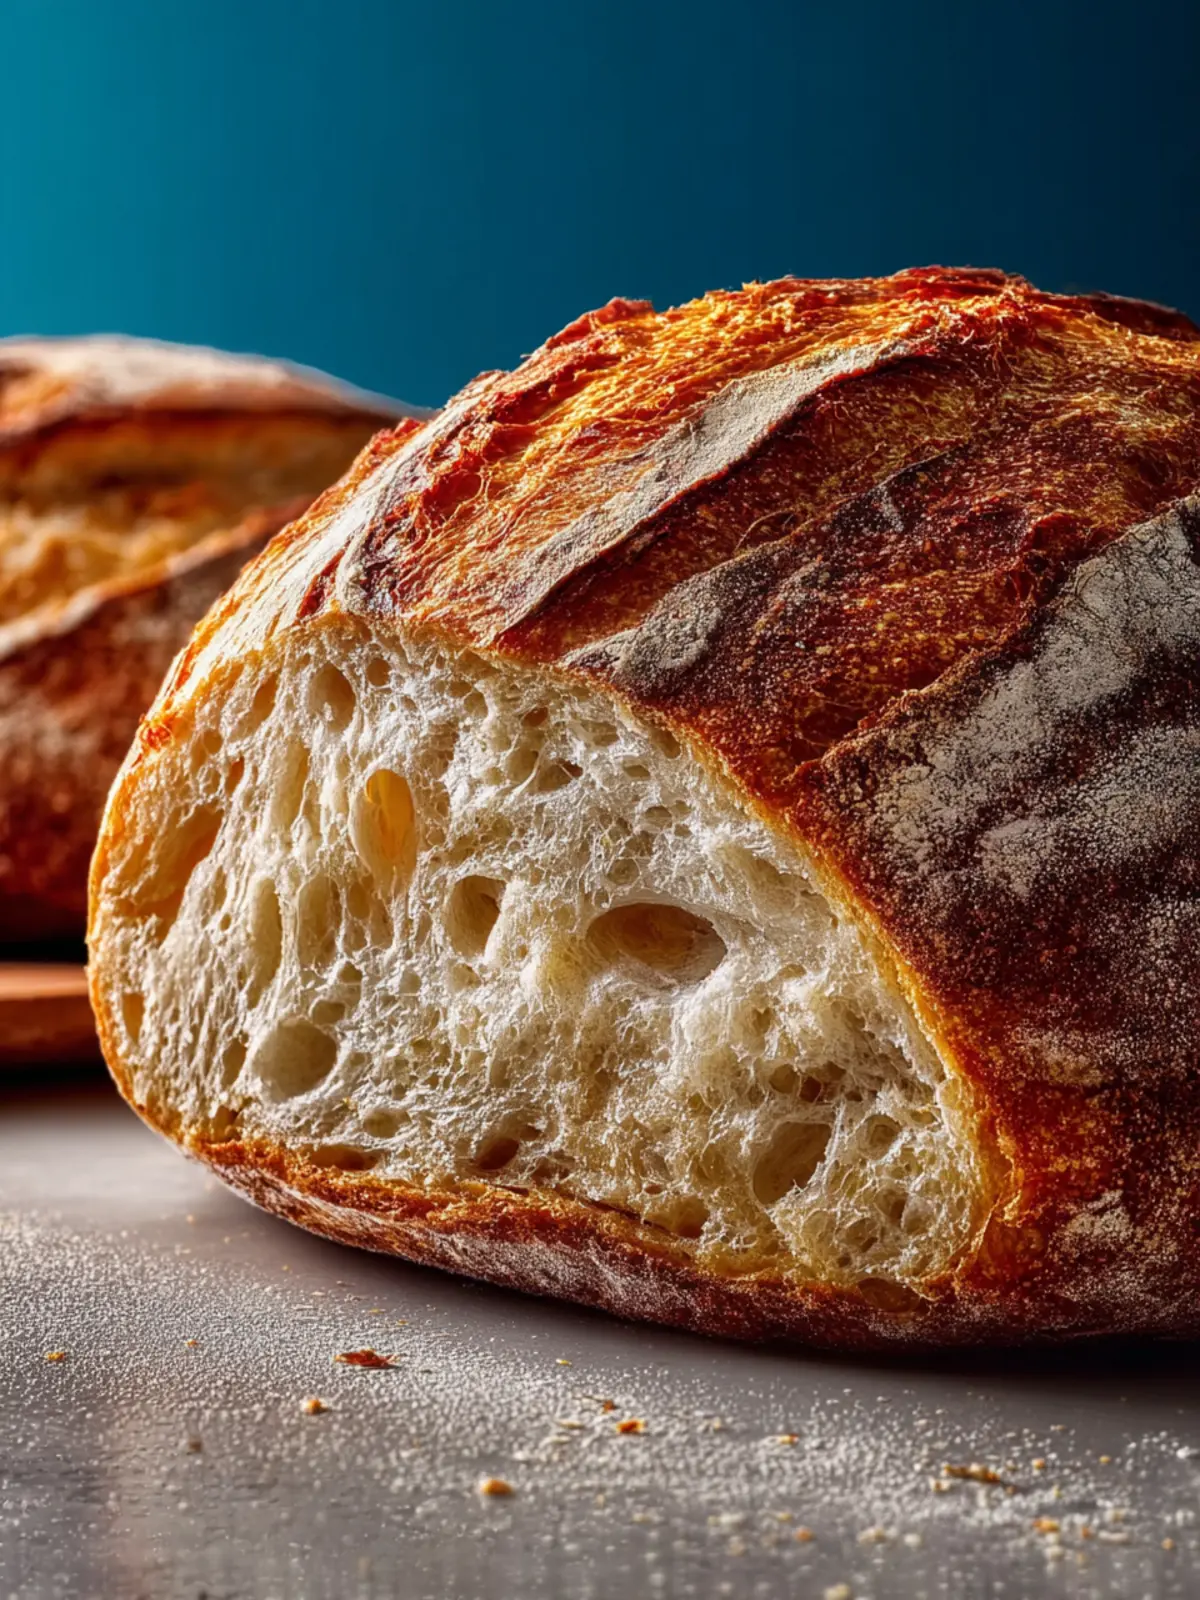
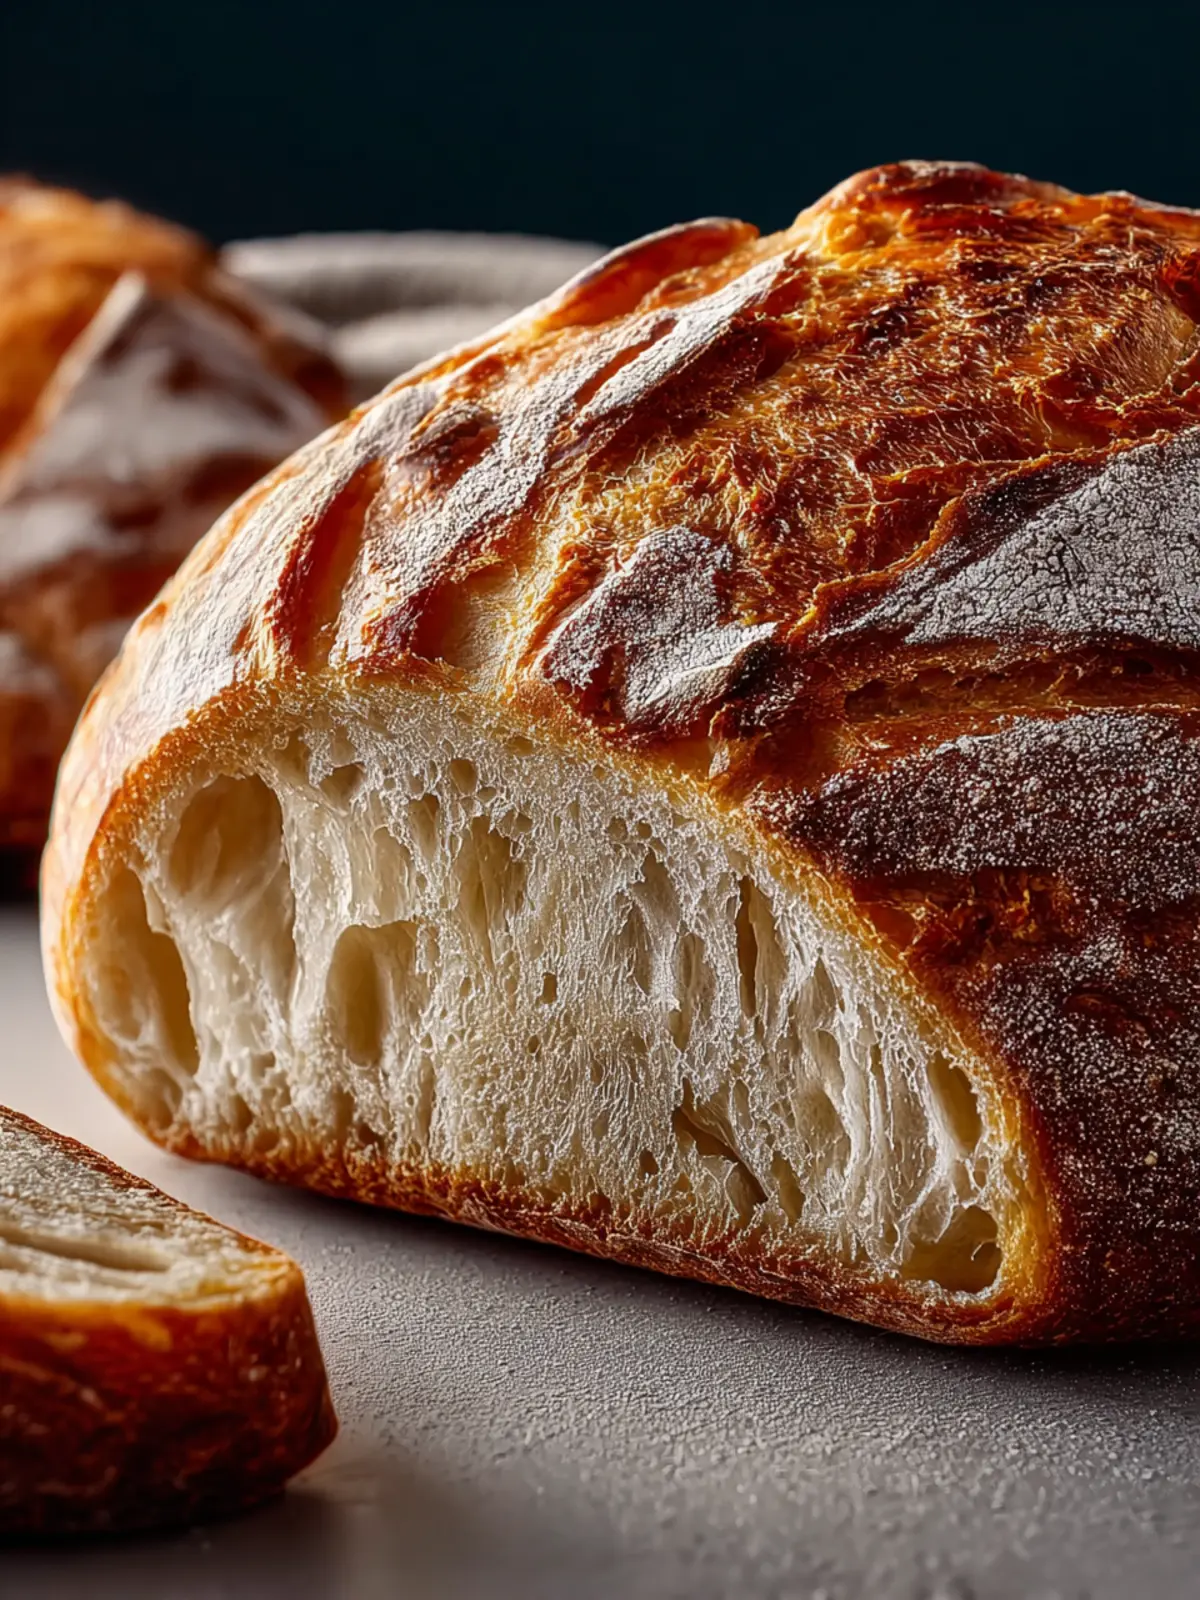
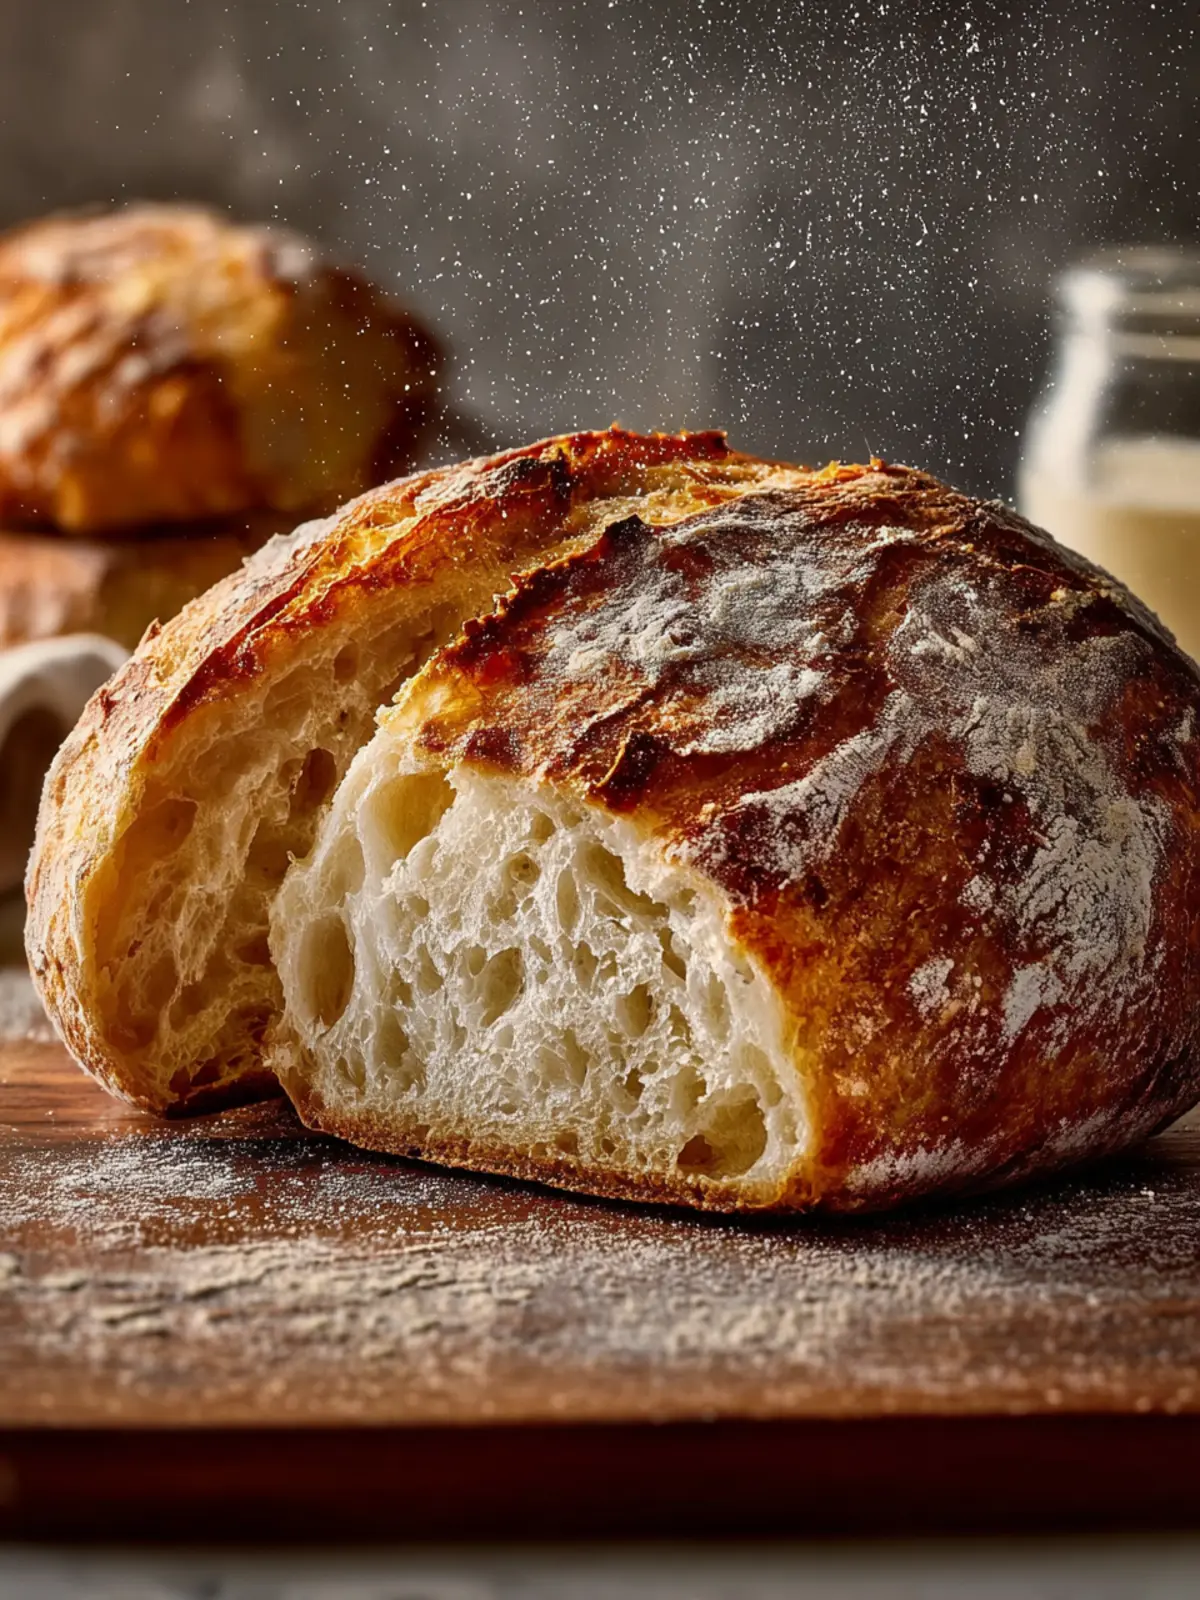
There’s something magical about sourdough bread—the way it transforms simple ingredients into a flavorful loaf that boasts both character and history. Imagine biting into a crusty exterior, followed by a chewy, airy interior that carries a hint of tanginess. This artisanal bread isn’t just about taste; it’s a journey into the world of fermentation and patience, allowing the wild yeasts in the air to work their magic over time.
Crafting your own sourdough bread can feel like a rite of passage in the kitchen, offering a way to connect with age-old baking traditions. The allure of sourdough lies not just in its taste and texture, but also in its health benefits. Rich in probiotics and easier to digest than regular bread, sourdough is an option that appeals to many.
What makes sourdough bread so special?
The uniqueness of sourdough bread stems from its leavening process, which relies on naturally occurring wild yeast and lactic acid bacteria. This wild fermentation process not only gives the bread its distinct flavor but also plays a significant role in the bread’s nutritional value. Studies have shown that sourdough fermentation can enhance the bioavailability of nutrients, making it easier for our bodies to absorb essential vitamins and minerals.
- Flavor Profile: The slow fermentation process develops complex flavors, giving sourdough its characteristic tang—a delightful contrast to its sweetness.
- Health Benefits: Many people who are sensitive to gluten find that they can enjoy sourdough without discomfort, as the fermentation process breaks down gluten structures. Plus, the lower glycemic index of sourdough means it won’t spike your blood sugar like conventional bread might.
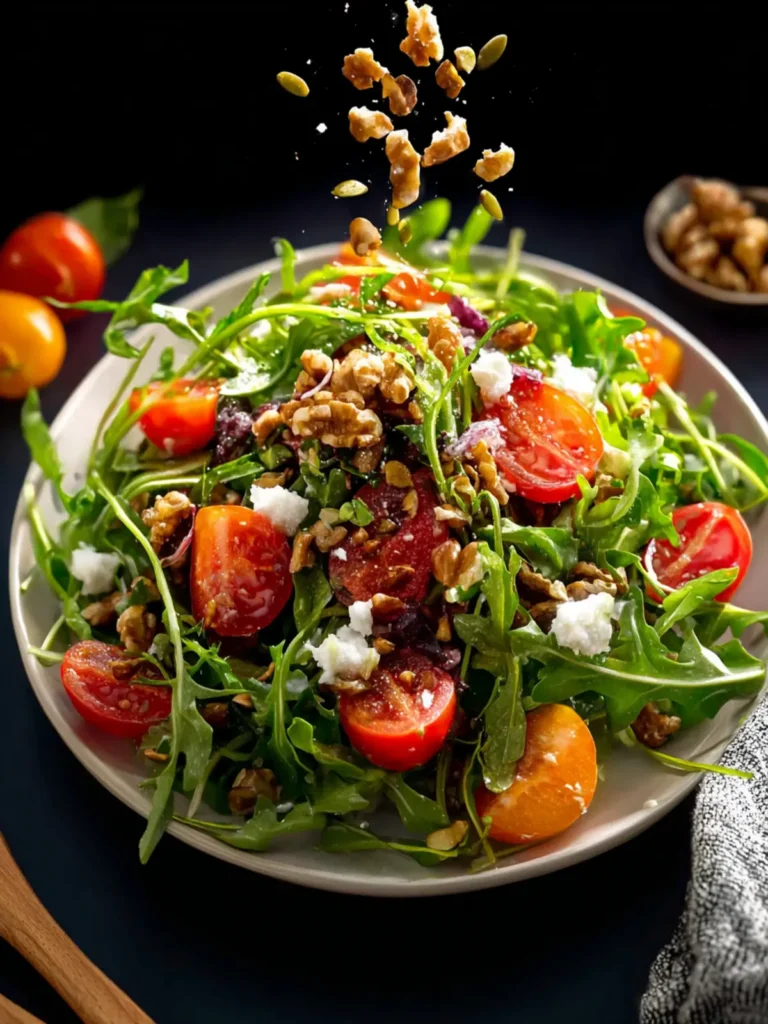
- Versatility: Whether you enjoy it slathered with butter, as the base for a sandwich, or simply alongside a bowl of soup, sourdough is incredibly versatile.
Embarking on the sourdough bread journey not only yields a delicious final product but also infuses your kitchen with warmth and character. So grab your ingredients, channel your inner baker, and let’s create something truly special together!
Key Ingredients for Sourdough Bread
Creating the perfect sourdough bread begins with selecting the right ingredients, each playing a vital role in crafting that irresistible loaf.
Flour: The backbone of sourdough bread, I prefer using either bread flour or all-purpose flour. Bread flour has a higher protein content, which enhances gluten development, yielding a chewier texture, while all-purpose flour provides a softer crumb. Depending on your desired final texture and flavor, both options can be delicious!
Water: Warm water is essential as it activates the yeast in your sourdough bread. It not only hydrates the flour but also encourages that beautiful fermentation process. When mixing your dough, aim for water that’s comfortably warm but not boiling—think around body temperature.
Active Sourdough Starter: This is your secret ingredient! The active sourdough starter not only leavens the bread but also imbues it with the characteristic tang that makes sourdough truly unique. Keep your starter fed and bubbly for the best results.
Salt: Often overlooked, salt is essential for flavor, enhancing each bite of your sourdough bread, and plays a critical role in controlling fermentation. It strengthens gluten and helps develop that coveted crust, making every slice unforgettable!
Why You’ll Love This Sourdough Bread
A flavor that’s irresistible
When you take your first bite of freshly baked sourdough bread, you’ll understand why this timeless recipe has garnered such a devoted following. The unique tanginess from the natural fermentation process creates an unexpected depth of flavor that commercial breads often lack. Each loaf is a delightful dance of textures; the crispy crust encloses a soft, chewy interior that simply invites you back for more.
The health benefits of fermentation
Beyond flavor, there are numerous health benefits associated with sourdough bread, primarily due to the fermentation process. This method not only helps develop unique flavors but also lowers the bread’s glycemic index, making it a better option for those watching their blood sugar. Additionally, the probiotics formed during fermentation promote gut health, and the longer rise time improves the bioavailability of nutrients like vitamins and minerals, making them easier for your body to absorb.
Perfect for sandwiches, toast, and more!
One of the best parts about sourdough bread is its versatility. Whether you’re crafting a gourmet sandwich piled high with your favorite ingredients or enjoying a simple slice with butter and jam for breakfast, this bread does it all! Its robustness means it holds up well against spreads and fillings, making it the ideal canvas for your culinary creativity. Plus, it’s an excellent choice for toasting—just imagine that satisfying crunch paired with a warm, golden interior. You’re bound to love every bite!
Tips for Making Perfect Sourdough Bread
Crafting the ideal sourdough bread involves a delightful dance between science and art. Let’s uncover some key elements that will elevate your loaves to bakery-level perfection.
Temperature Control: Understanding Warmth for Yeast Activity
Temperature plays a crucial role in your sourdough bread journey. Yeast thrives in warmth, ideally between 75°F and 85°F. Too cold, and your dough will be sluggish; too hot, and it could kill off your yeast. A fantastic tip is to find a warm spot in your kitchen—perhaps near the oven or on top of your refrigerator—where your dough can rise comfortably. Using a thermometer can help you monitor this with precision.
Timing: Importance of Resting and Folding
Resting your dough isn’t just an afterthought; it’s essential. Give it a chance to relax and develop flavor, roughly every 30 minutes during the first rise. Folding your dough during this time also strengthens gluten and creates a lovely structure. Think of it as giving your dough a gentle workout, which makes all the difference in achieving that perfect chewy crust!
Scoring Techniques: The Art of Scoring for Aesthetic and Oven Spring
Scoring is not merely decorative—it influences how your sourdough bread expands in the oven. A sharp blade achieves clean cuts. Aim for a shallow angle while scoring, as deep cuts can deflate the loaf. Fun fact: each design can impact steam release, so experiment with simple slashes or more complex patterns. Remember, this is where your creative flair shines!
Time Details for Sourdough Bread
Crafting the perfect sourdough bread is both an art and a science that requires careful attention to timing. Understanding the time details not only sets expectations but also enhances your baking experience.
Preparation time
The preparation for your sourdough bread takes about 30 minutes. This includes mixing your ingredients, autolyse—a fancy term for letting the flour and water sit so they hydrate properly—and creating your dough.
Rising time
Next comes the rising time, which is crucial for developing those delightful flavors. Expect it to take around 4 to 6 hours, depending on the temperature of your kitchen and the strength of your starter. Patience pays off here!
Baking time
When it’s finally time to bake, your sourdough bread will need approximately 30 to 45 minutes in the oven. Keep an eye on it; the goal is a perfect golden crust.
Total time
All in all, from start to finish, you’re looking at about 5 to 7 hours, including rising and baking. Note that many bakers prefer to let their dough rise overnight for even better flavor, making this process a rewarding endeavor!
Nutritional Information for Sourdough Bread
Understanding the nutritional information for sourdough bread can help you appreciate each slice as you enjoy this flavorful loaf. With its unique fermentation process, sourdough offers health perks alongside delicious taste.
Calories
One medium slice of sourdough bread typically contains around 70-80 calories, making it a satisfying choice for your meals without overwhelming your caloric intake.
Protein
Sourdough bread is a respectable source of protein, delivering about 2-3 grams per slice. This makes it a great option for those looking to incorporate protein into their diets, especially when paired with toppings like avocado or nut butter for a balanced meal.
Sodium
When it comes to sodium content, a slice of sourdough bread generally has about 130-150 mg. This is a moderate amount, allowing you to enjoy your bread while still keeping your overall sodium intake in check for heart health.
FAQs about Sourdough Bread
Baking your own sourdough bread can be a transformative experience, filling your kitchen with tantalizing aromas and the comforting allure of homemade goodness. However, questions often arise when embarking on this delightful baking journey. Here are some common inquiries to guide you through.
What if my sourdough starter isn’t bubbly?
If your sourdough starter isn’t bubbly, don’t be alarmed. This can happen for several reasons, such as temperature or feeding routine. Here’s what you can do:
- Temperature: Ensure your starter is kept in a warm place; 75°F to 85°F (24°C to 29°C) is ideal for activity.
- Feeding Schedule: Make sure you’re feeding it regularly, ideally every 12 to 24 hours.
- Quality Flour: Using whole grain flours can give your starter a boost, as they contain more nutrients.
If your starter is still not bubbly after a week of regular feedings, you might need to create a new one from scratch.
Can I skip the proofing step?
Proofing is essential for developing the character and texture of your sourdough bread. Skipping this step may yield a denser loaf, lacking the airy structure that makes sourdough delightful. The fermentation process during proofing contributes to flavor complexity and crumb structure, so it’s best not to rush through it.
How can I store sourdough bread for freshness?
To keep your sourdough bread fresh, proper storage is key. Here are a few tips:
- Room Temperature: Keep your bread in a paper bag or a bread box; this allows it to breathe and prevents mold.
- Freezing: If you need to store it longer, slice the bread and wrap it tightly in plastic wrap, then foil. This method keeps your bread fresh for up to three months.
- Avoid Plastic Bags: Storing bread in plastic can trap moisture, making it soggy—definitely not the goal!
With these tips, you’re set to enjoy your sourdough bread to the fullest. Happy baking!
Conclusion on Sourdough Bread
The joy of baking from scratch
There’s something infinitely satisfying about creating sourdough bread from simple ingredients. Watching your dough transform from a shaggy mass into a beautifully risen loaf is a journey that connects you to a rich tradition of baking. The aromas fill your home, encompassing every corner with warmth and inviting memories.
Encouragement to experiment and enjoy the process
Remember, every loaf tells a story. Don’t be afraid to adjust techniques or flavors; experimenting is part of the fun! Whether you’re infusing herbs or trying a different flour, each variation can lead to delicious discoveries. Enjoy the process, embrace the imperfections, and savor the rewards of your creativity. Happy baking!
Print
Sourdough Bread
- Total Time: 10 hours
- Yield: 1 loaf 1x
- Diet: Vegetarian
Description
Learn how to make a delicious sourdough bread from scratch with this easy-to-follow recipe.
Ingredients
Scale
- 4 cups bread flour or all-purpose flour
- 1⅔ cups warm water
- 1 cup active sourdough starter
- 2 teaspoons salt
Instructions
- In a large mixing bowl, combine 4 cups of flour and 1⅔ cups of warm water.
- Stir until a shaggy dough forms, then let it rest for 30 minutes.
- After resting, add 1 cup of active sourdough starter and 2 teaspoons of salt.
- Mix well until everything is fully combined.
- Cover the bowl with a clean towel or plastic wrap.
- Let the dough sit at room temperature.
- Every 30 minutes for 2 hours, perform a set of stretch and folds.
- To stretch and fold, pull one side of the dough upward and fold it over itself.
- Turn the bowl a quarter turn and repeat three more times.
- After the final fold, cover the bowl again and let the dough rise for 6 to 8 hours.
- It should double in size and appear bubbly and puffy.
- Gently transfer the dough to a lightly floured surface.
- Shape it into a round or oval loaf by folding and tucking the edges underneath.
- Place the shaped dough seam-side up into a floured proofing basket or towel-lined bowl.
- Cover and refrigerate for 8 to 12 hours.
- The next day, place a Dutch oven into your oven and preheat to 450°F (232°C).
- Remove the dough from the fridge and turn it out onto parchment paper.
- Score the top of the dough with a sharp knife or razor blade.
- Carefully lower the dough into the hot Dutch oven using the parchment paper.
- Cover and bake for 20 minutes.
- Remove the lid and bake uncovered for another 25 minutes.
- Take the bread out of the Dutch oven and let it cool completely on a wire rack before slicing.
Notes
- Ensure your sourdough starter is active for best results.
- Adjust the hydration of the dough depending on the flour used.
- Letting the dough rise longer can improve the flavor.
- Prep Time: 30 minutes
- Cook Time: 45 minutes
- Category: Bread
- Method: Baking
- Cuisine: American
Nutrition
- Serving Size: 1 slice
- Calories: 80
- Sugar: 0g
- Sodium: 200mg
- Fat: 1g
- Saturated Fat: 0g
- Unsaturated Fat: 0g
- Trans Fat: 0g
- Carbohydrates: 15g
- Fiber: 1g
- Protein: 3g
- Cholesterol: 0mg